
Installation & assembly
split air conditioning
Questions? Our support is available from Monday to Friday from 09:00 - 17:00
Each product comes with detailed installation and operating instructions.
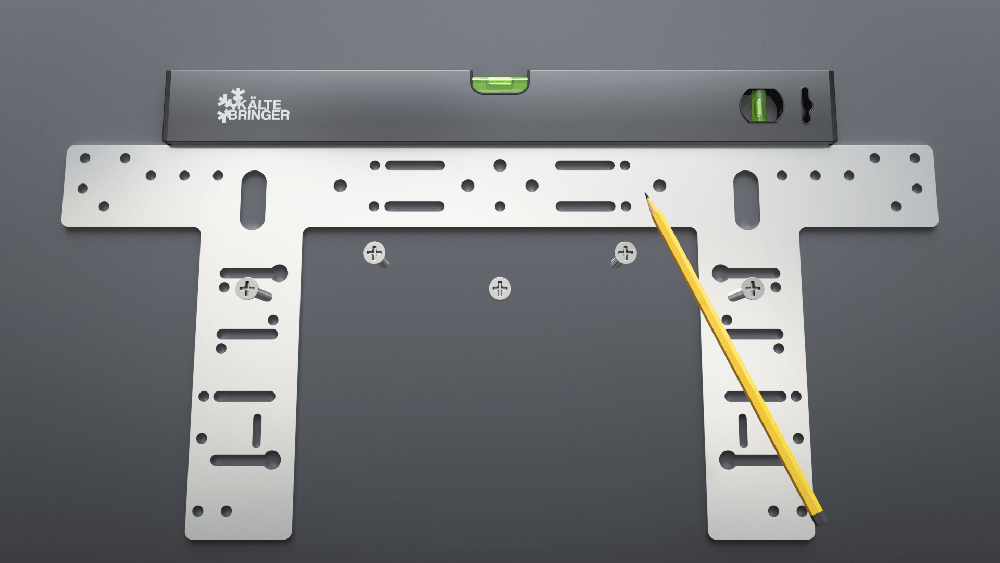
Step 1
Installing the wall bracket for the indoor unit.
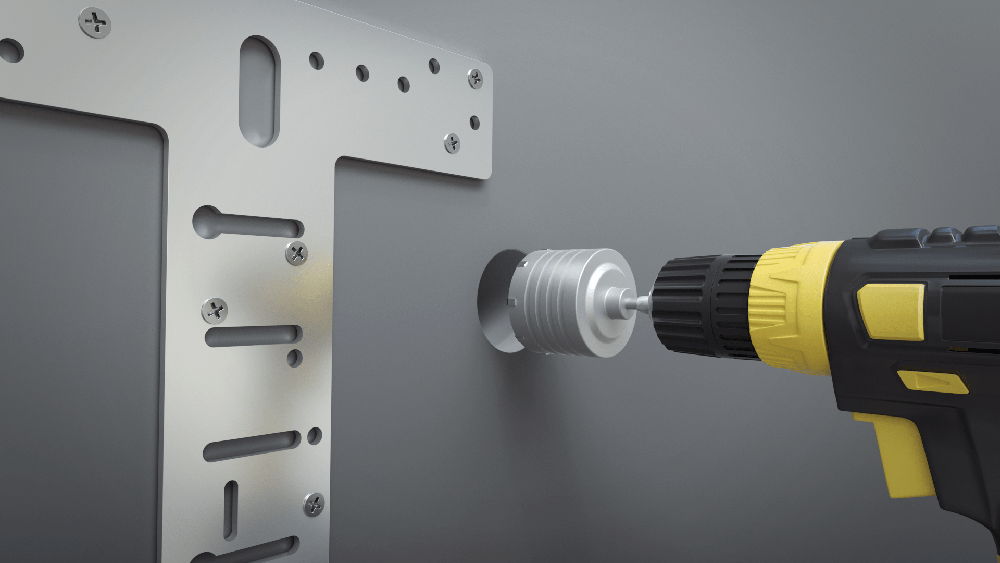
step 2
Drilling the hole for the pipeline
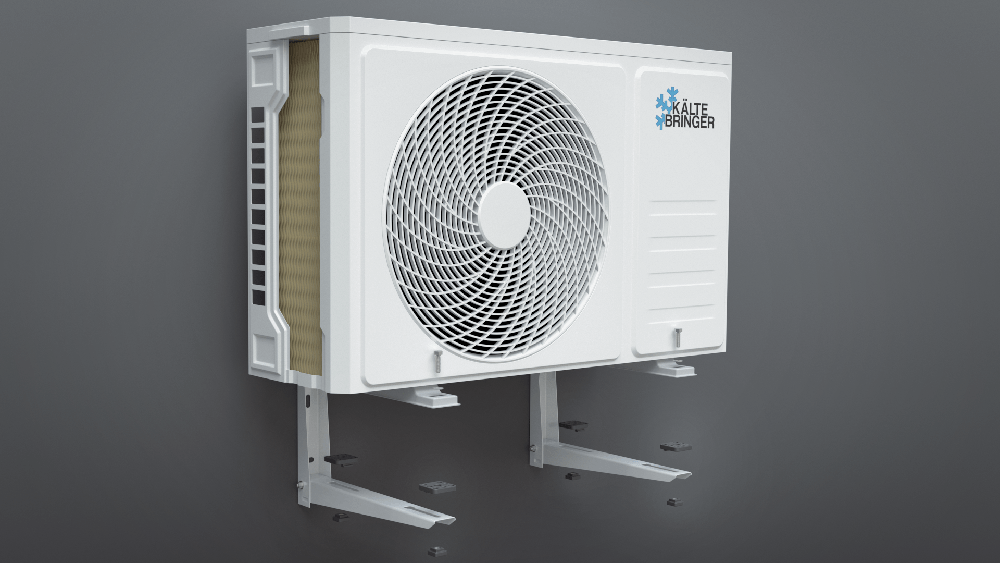
step 3
Installation of the outdoor unit.
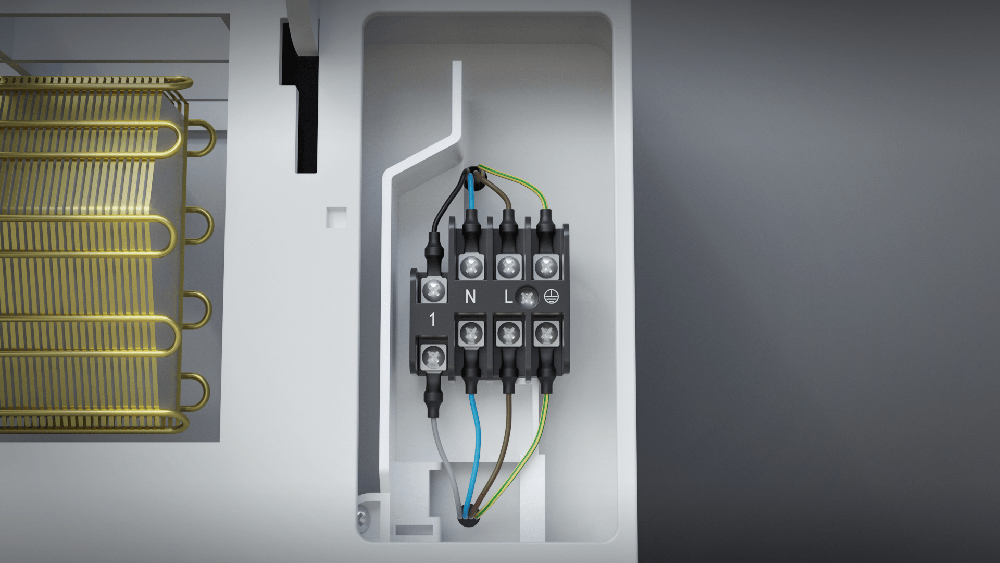
step 4
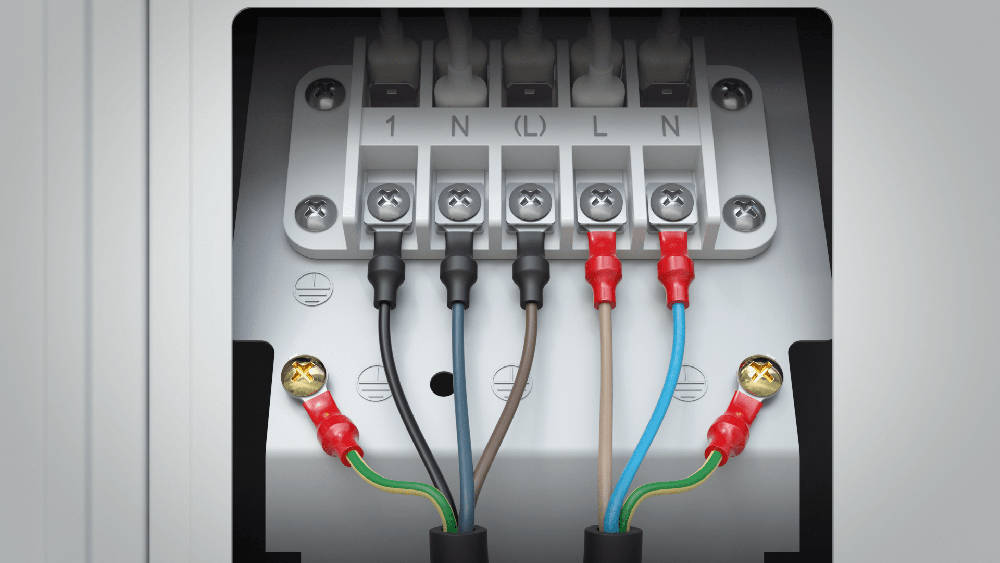
Indoor unit electrical connections.
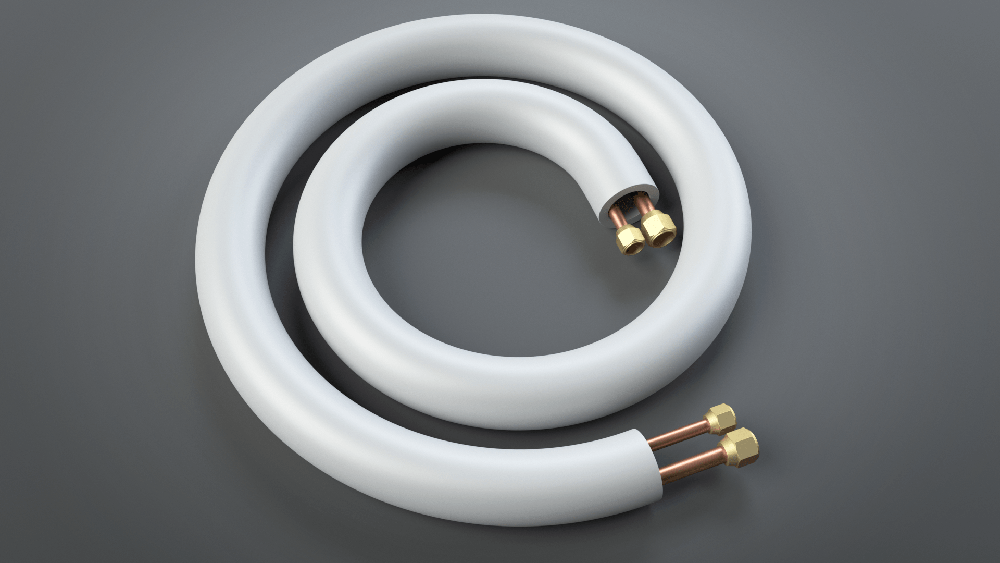
step 5
Unrolling the refrigerant line.
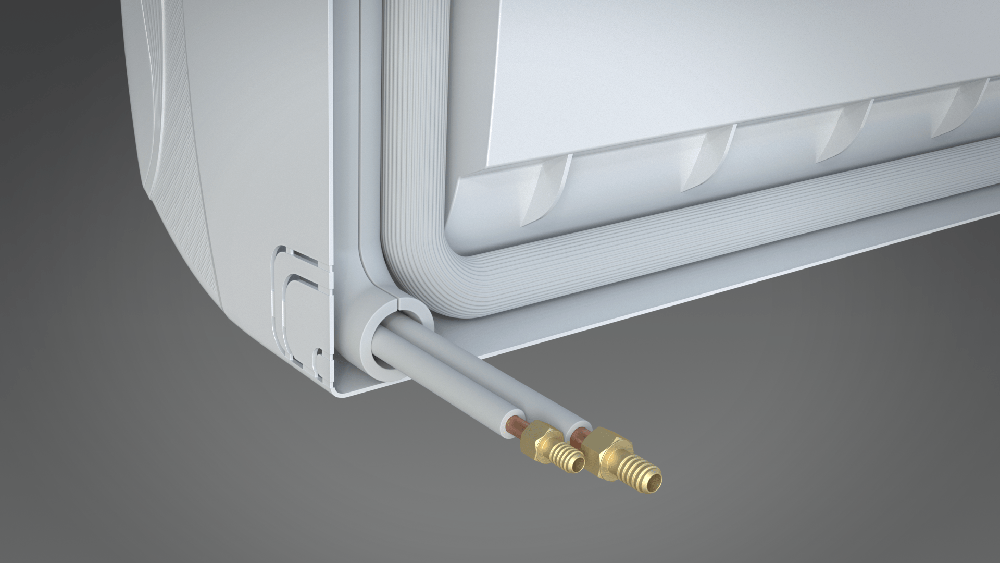
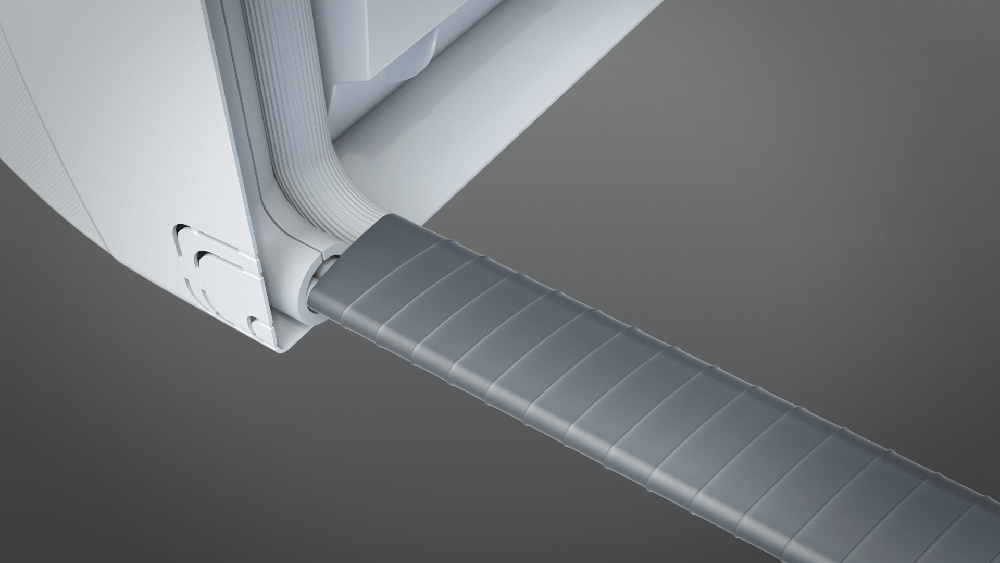
step 6
Position indoor unit piping.
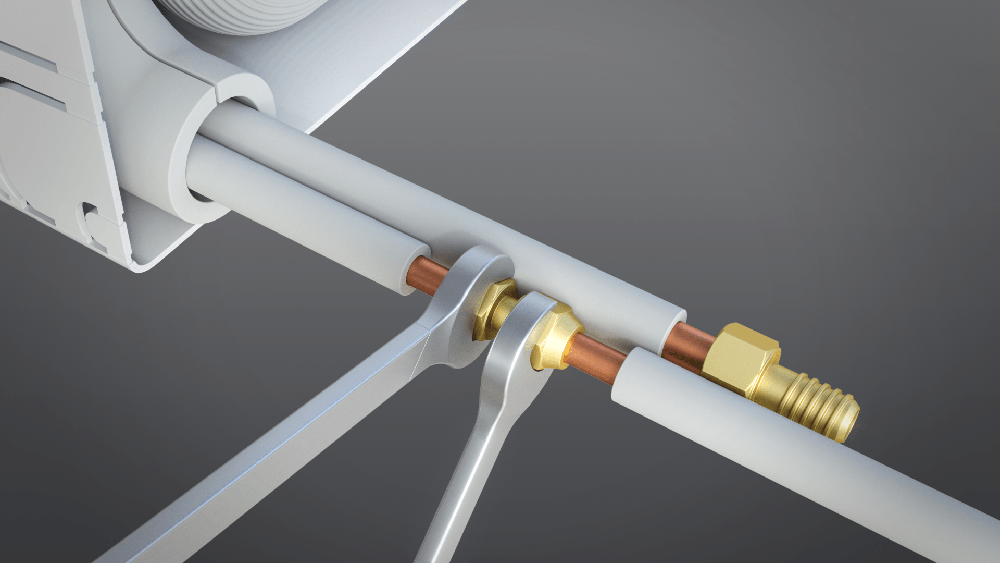
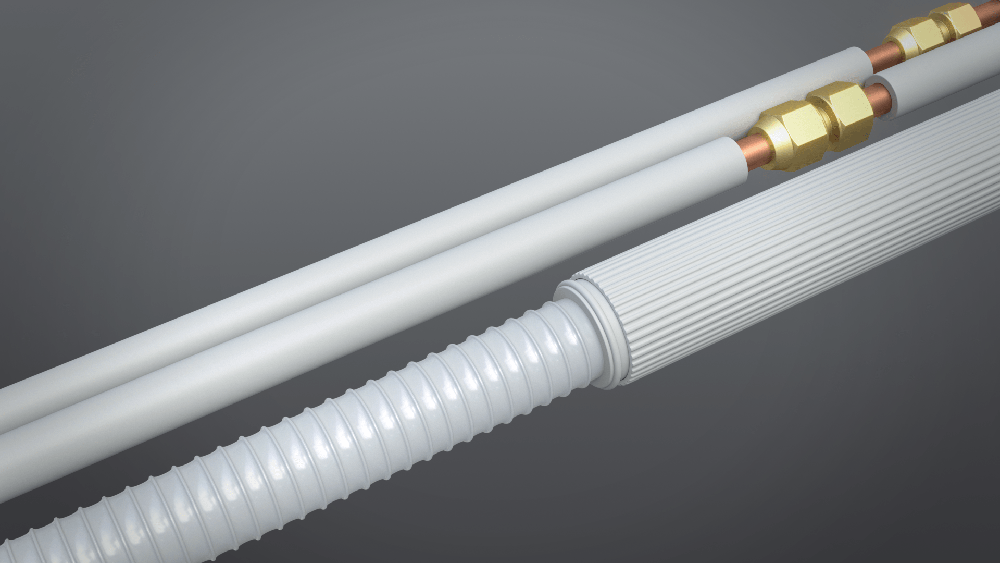
step 7
Connect pipes to each other
step 8
Bundle cables into a strand.
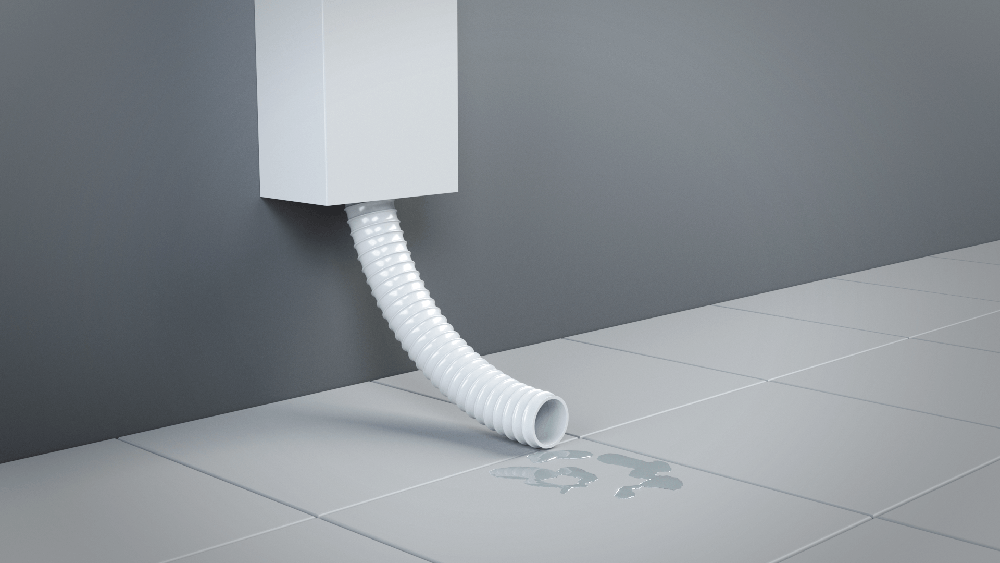
step 9
Connect and seal the drain hose
step 10
Sheath with vinyl tape.
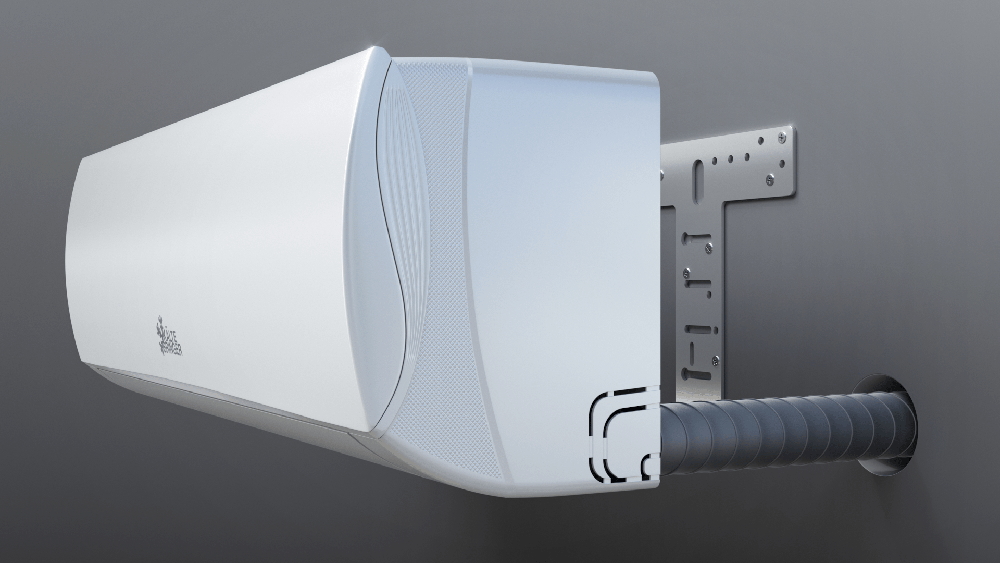
step 11
Fixing the indoor unit.
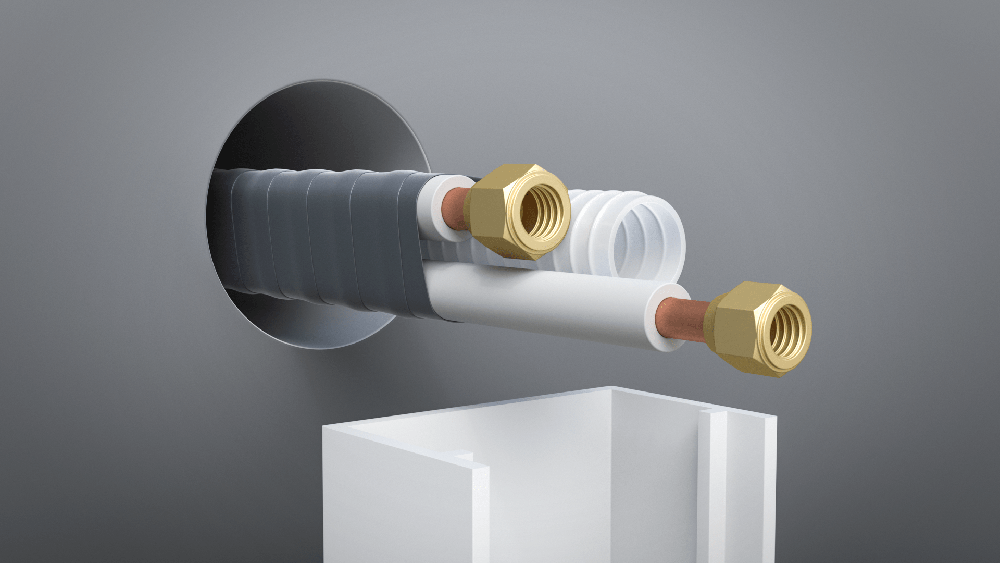
step 12
Lead lines through the outer wall.
step 13
Lay the drain hose.
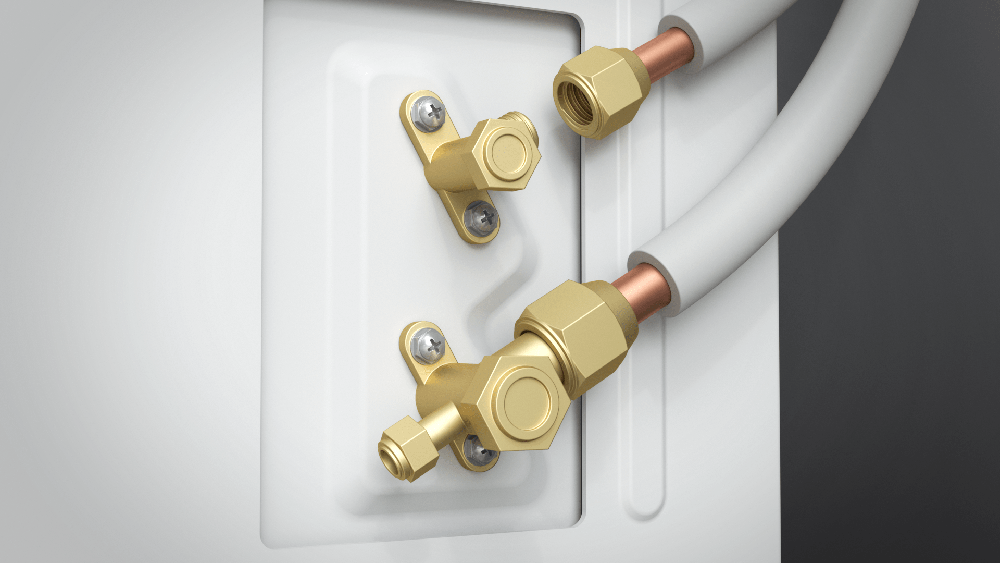
step 14
Connect the outdoor unit to the piping.
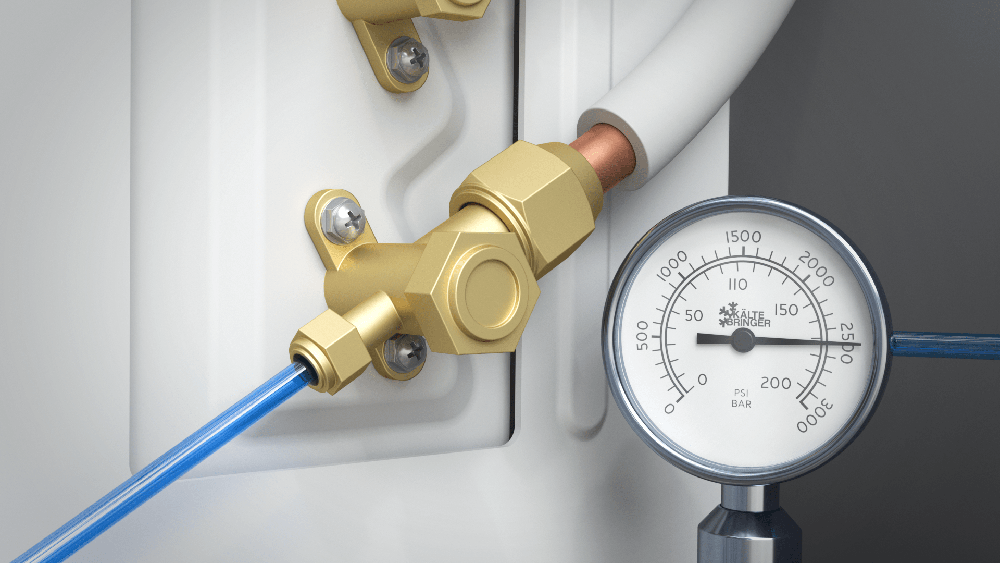
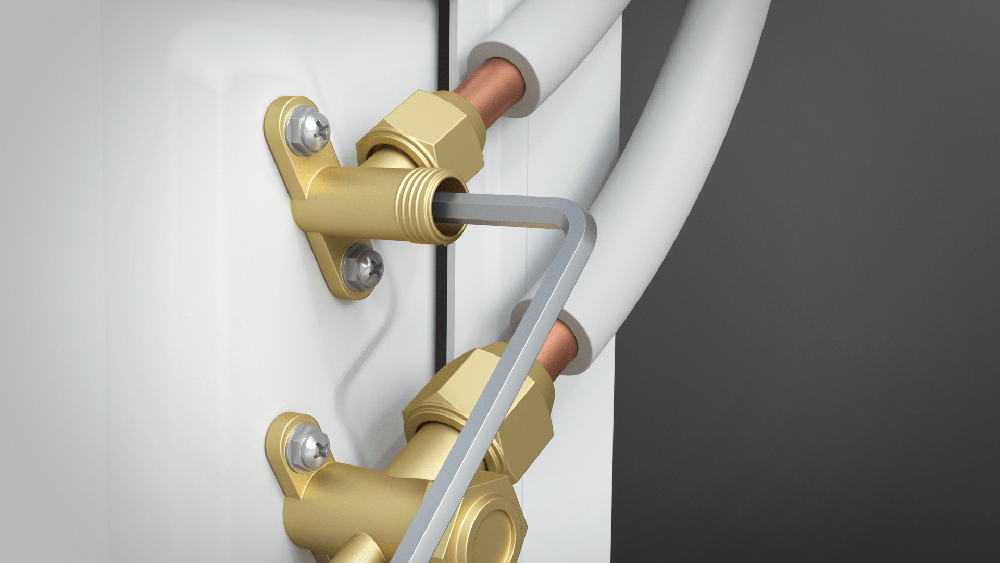
step 16
Open refrigerant valves.
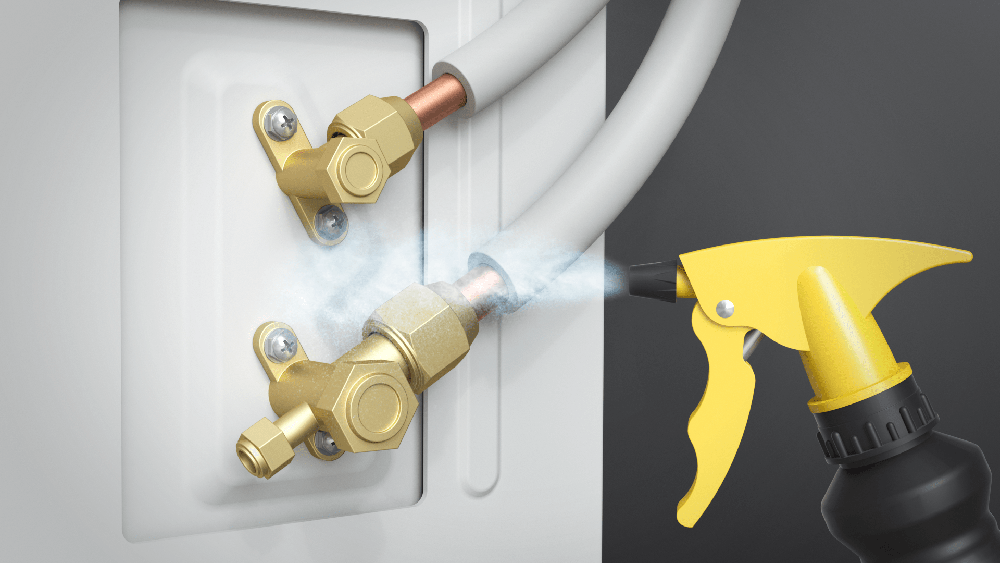
step 17
Check the connection for leaks.
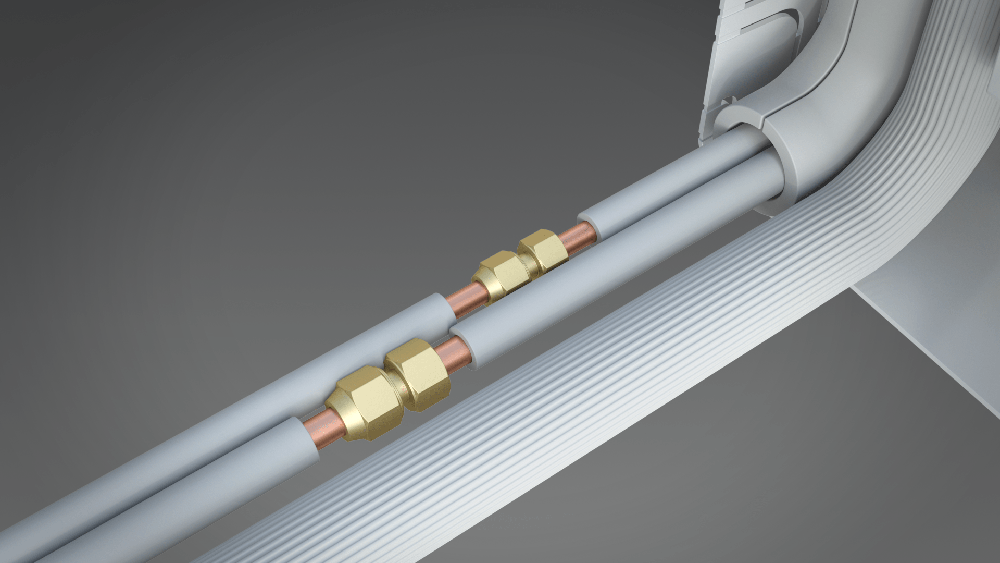
step 18
Connection of the lines to the outdoor unit.
A notice:
*Note: The installation of the air conditioning system may only be carried out by a company certified according to Regulation (EU) No. 517/2014. By concluding the purchase contract, you confirm that this will be observed. *Refrigerant leakage contributes to climate change. In the event of a leak, refrigerants with a lower global warming potential (GWP) contribute less to global warming than those with a higher global warming potential (GWP). This equipment contains refrigerants with a GWP equal to 675. Thus, a 1kg leak of this refrigerant would have 675 times the global warming impact than 1kg of CO2 over a 100 year period. Do not carry out any work on the refrigeration circuit or disassemble the device - always consult qualified personnel.